Confirm Document Details
🧾 Description
In this step of the Ditto ID identity verification process, the user is shown the data that was extracted from their uploaded identity document. This is a visual confirmation screen before proceeding to biometric selfie capture.
Once a user uploads a document (front and optionally back), Ditto ID’s OCR engine scans and extracts data such as:
- 👤 Name
- 📅 Date of Birth
- 📆 Date of Expiry
- 🪪 Document Type
- 🖋️ Signature (if available)
- 🖼️ Photo
🛡️ V3 Structure Support
If Document Scan Structure V3 is enabled, this screen will also display:
- ✅ Various validation checks performed on the document (e.g., expiry, authenticity)
- 🧠 Field-level checks and confidence levels (as configured)
To enable V3 structure, update the sdk.app.settings config in GM portal.
🔁 User Actions
- 👁️ Review all scanned details shown on screen.
- 🔄 If details are incorrect, the user can choose to Rescan Document.
- ✅ If details are accurate, user clicks CONFIRM to proceed to the next step (Selfie Capture).
📷 UI Preview
Screens may look like this :
- Scanned document summary with extracted fields
- User's photo and signature preview
- "Confirm" button to proceed
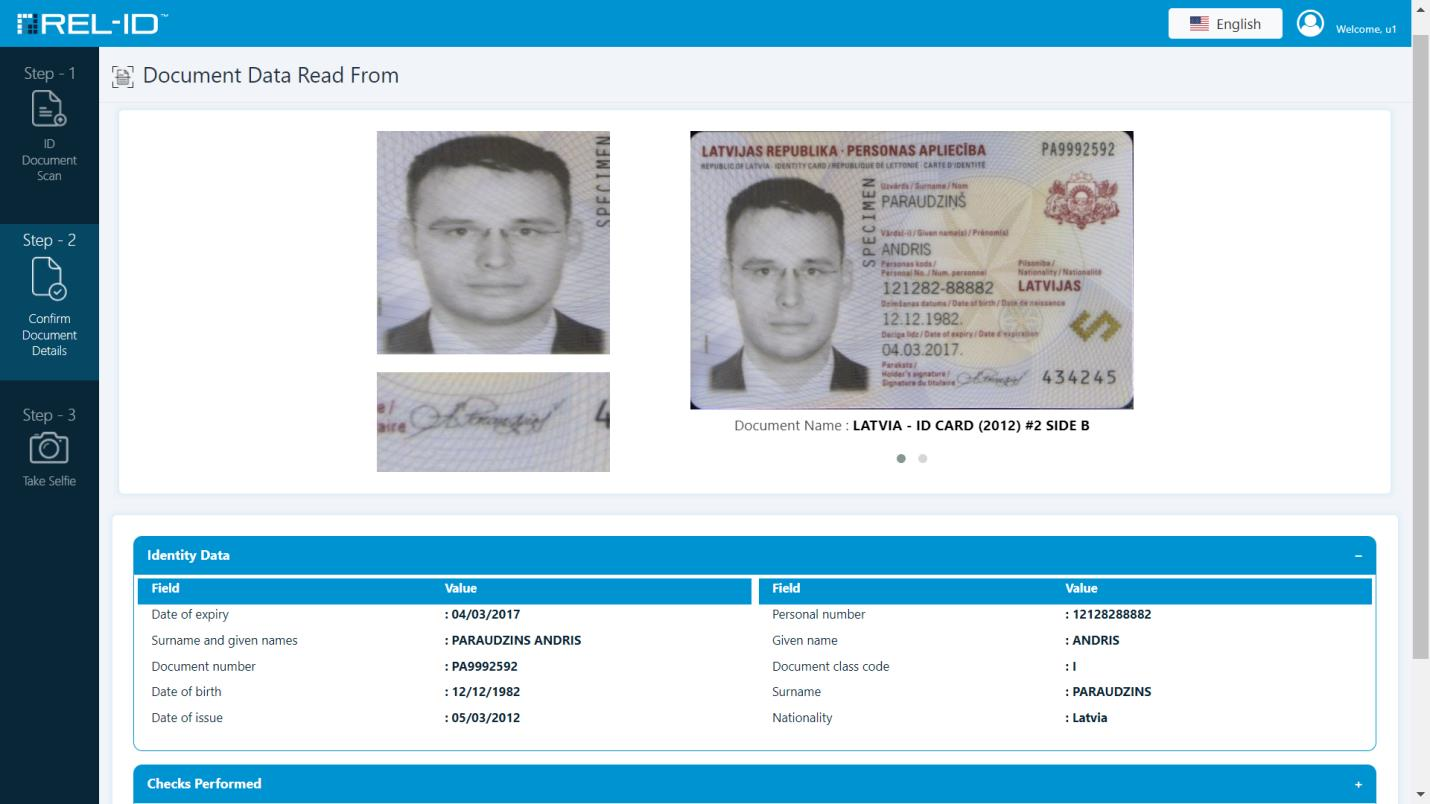
Figure 1: IdvWebServer Confirm Document Details
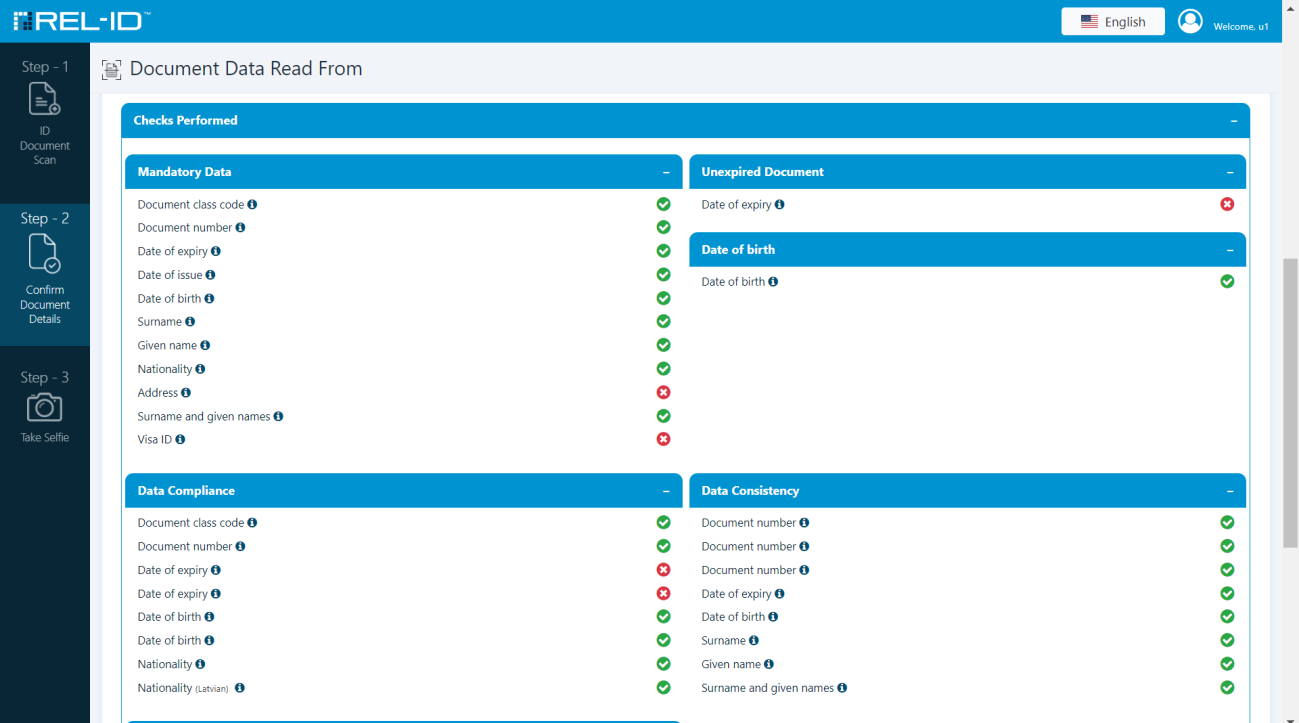
Figure 2: IdvWebServer Confirm Document Details
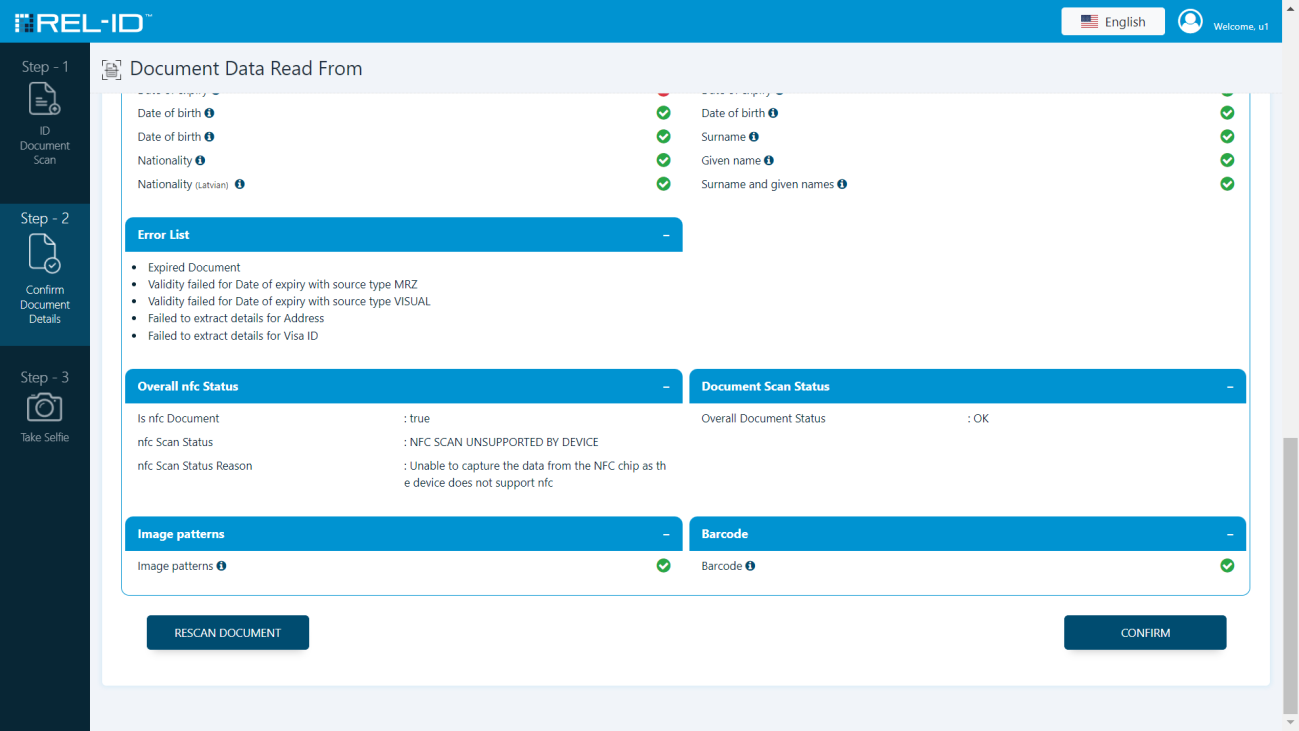
Figure 3: IdvWebServer Confirm Document Details
🧩 Additional Notes
- Scanned data is not editable by the user.
- Back photo upload is optional but encouraged for improved data extraction accuracy.
- If document scan fails, user is prompted to re-upload or retake photo.
🔄 After confirming document details, the flow proceeds to:
Updated 4 months ago